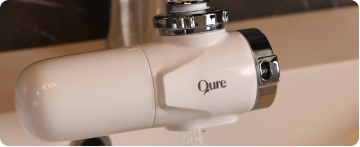
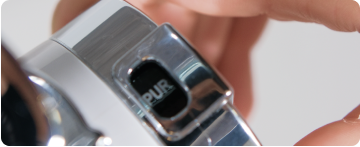
We recommend replacing the filter cartridge every 3 months to ensure optimal performance and maintain clean, purified water for your skincare routine. In areas with poor water quality, more frequent replacements may be necessary.
You are $100 away from Free Shipping!
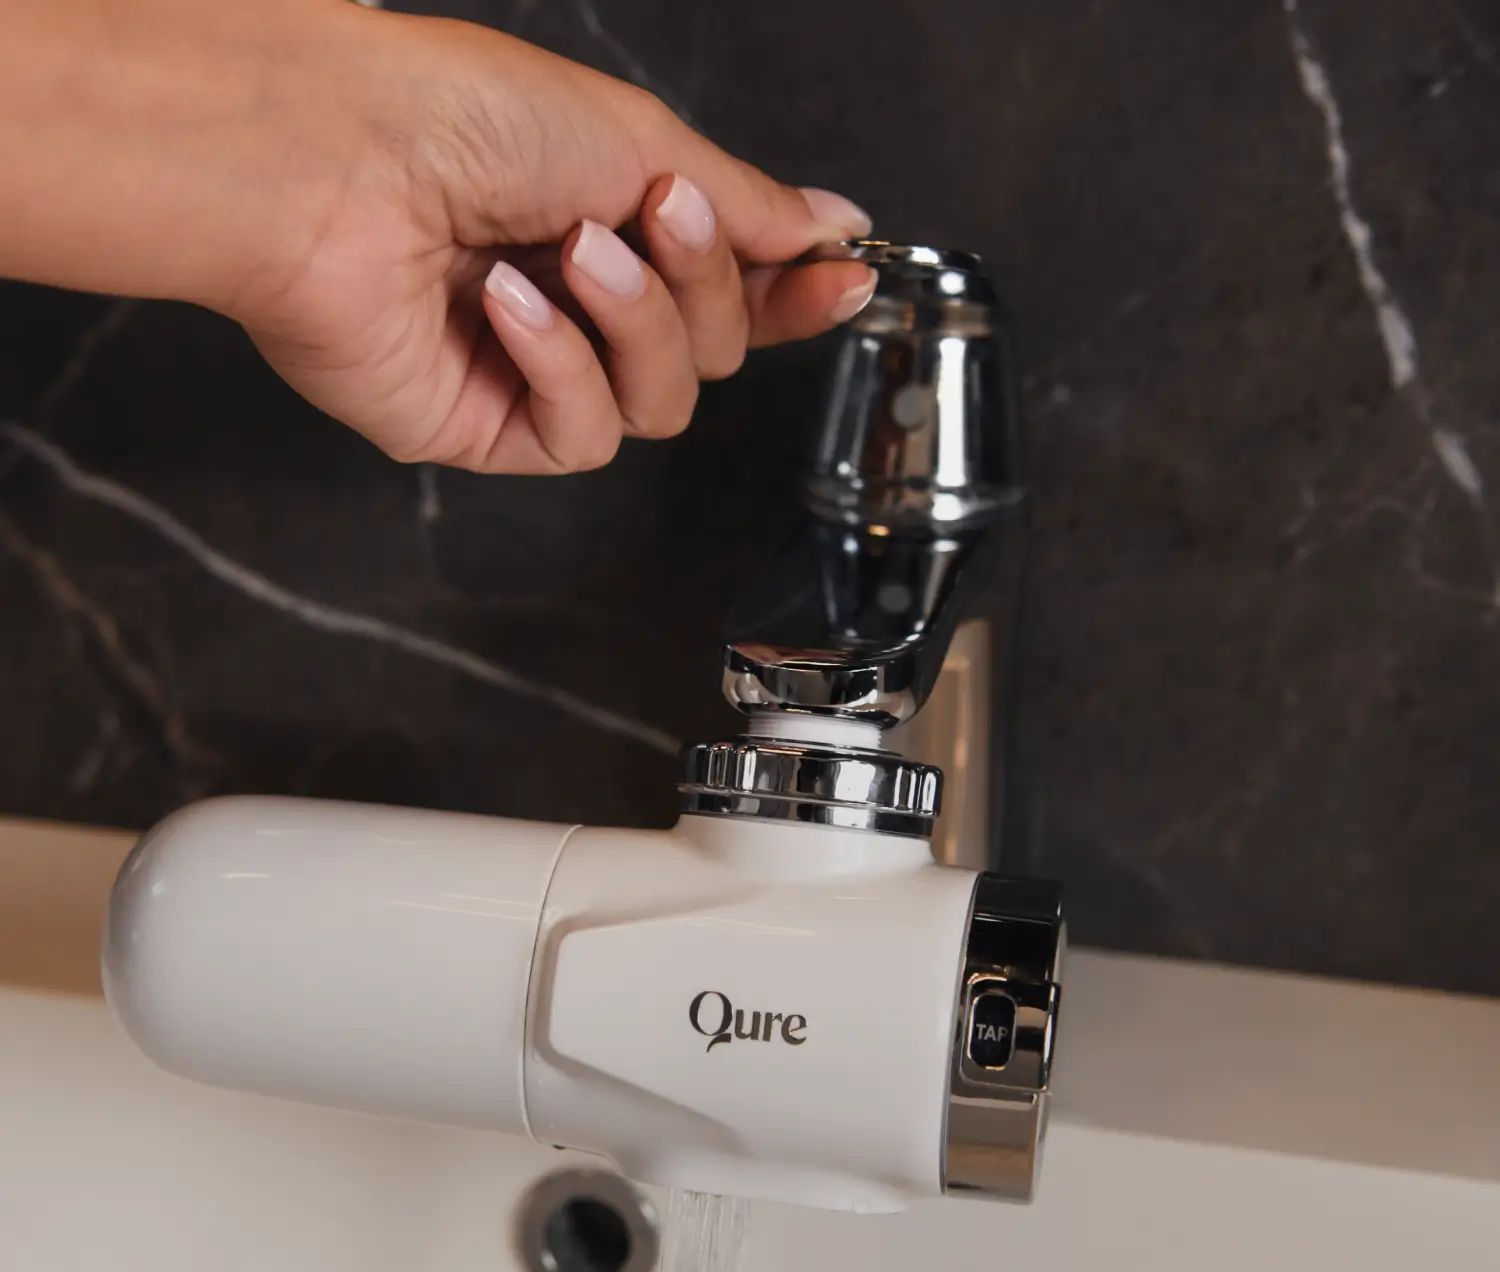
Tap into purified water for better skin.
Q-urify Water Filter Guide
Installation and Replacement Procedures

Please read the complete instruction manual carefully before installing and using your Q-urify Water Filter.
Why you’ll love Q-urify Water Filter
Q-urify Water Filter reduces skin irritants like calcium and magnesium from your tap water to help maintain the integrity of your skin barrier for healthier, clearer, more hydrated skin.

Q-urify Water Filter reduces skin irritants like calcium and magnesium from your tap water to help maintain the integrity of your skin barrier for healthier, clearer, more hydrated skin.
It’s easy to install, and the filter only needs to be replaced once every 3 months.
1
Recommendations of use
This manual gives information about the safe use of the Qure™ Q-urify Water Filter. It is the responsibility of the user to carefully read all information presented in this manual and guide before starting to use the Qure™ Q-urify Water Filter. It is always the responsibility of the user to adhere to the instructions in this manual. Keep this Instruction for use so it’s always accessible.
DISCLAIMERQure Skincare Pty Ltd or its representatives hold no responsibility for treatment outcomes as individual results may vary. Qure™ Q-urify Water Filter is not designed to cure diseases, and is to be used as directed.
To ensure a safe and effective experience, please read and understand the following disclaimers before using the Q-urify Water Filter.
Water Quality Variability:
The effectiveness of the filter may vary based on the tap water quality in different locations. It may not remove all impurities or contaminants, and users should be aware of these limitations.
Maintenance Requirements:
Follow the maintenance and replacement schedule outlined in this user manual. Failure to do so may compromise the filter's effectiveness.
Not a Medical Device:
This tap water filter is not a medical device. It is not a substitute for professional medical advice or treatment. Seek guidance from a healthcare professional for specific skin concerns.
Manufacturer's Liability:
The manufacturer's liability is limited. We are not responsible for any skin reactions, damages, or other issues that may arise from the use of this product.
Discontinue Use if Issues Arise:
Discontinue use and seek professional advice if you experience any skin irritation, redness, or other adverse reactions.
Intended Use:
This filter is intended for skincare purposes only. Do not use it for drinking water or other non-skincare applications.
Skin Sensitivity:
Users with sensitive skin or skin conditions should consult with a dermatologist before using the filtered water for skincare, as individual skin reactions can vary.
Regulatory Compliance:
Ensure that the tap water filter complies with relevant regulatory standards for skincare devices. Check for certifications and testing conducted to meet these standards.
Proper Installation:
Properly install and use the filter according to the provided instructions. Incorrect installation may affect the performance of the filter.
Please contact our customer support if you have any questions or concerns. Thank you for choosing our product, and we hope it enhances your skincare routine.
CONTACT DETAILS
Qure Skincare Pty Ltd
Sydney, NSW 2000
Australia
Phone: +1 240 702 2228
Email: support@qureskincare.com
Website: www.qureskincare.com
2
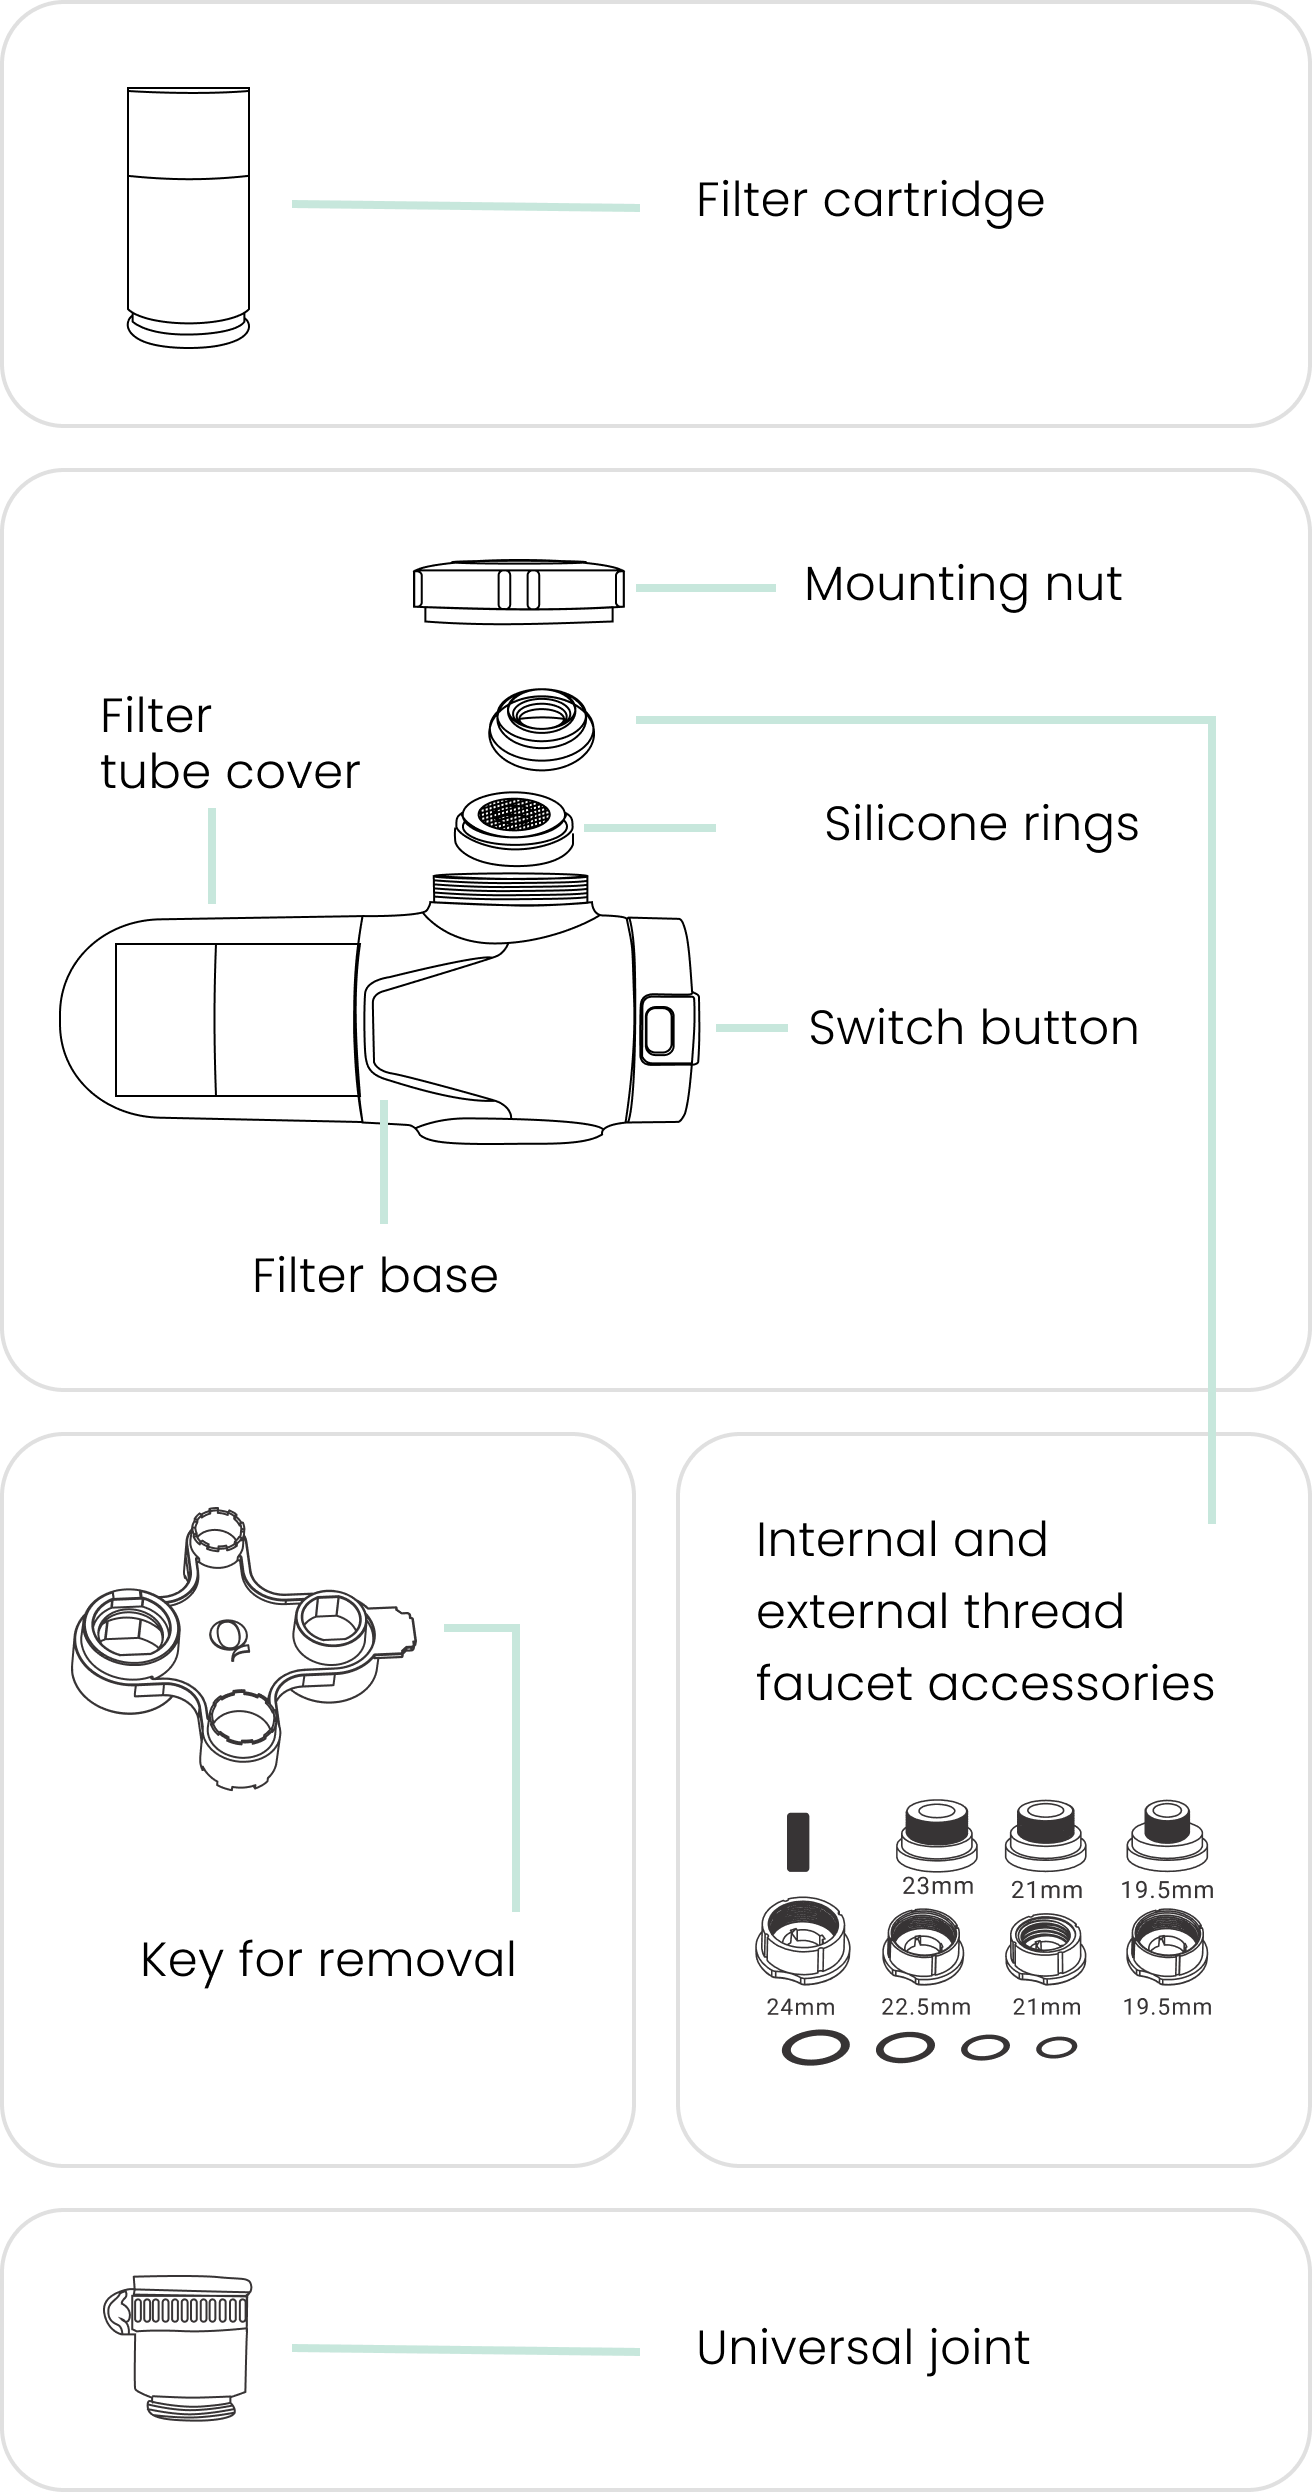
Q-urify Water Filter overview

3
What’s included
Key for Removal1pc
Universal joint1pc
Silicone rings4pcs
Faucet thread accessories7pcs
Q-urify Water Filter1pc
Filter cartridge1pc
User Manual1pc
4
Faucets not supported
Q-urify Water Filter is currently compatible with almost all faucets with a circular tip. Although we have supplied enough faucet thread accessories to match the majority of faucets, some still may not be supported, as shown below:
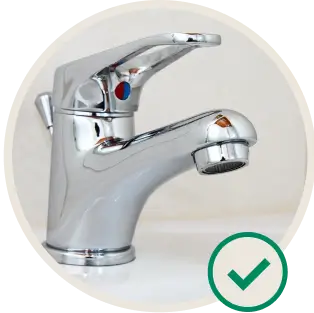
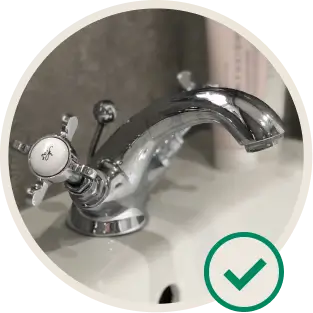
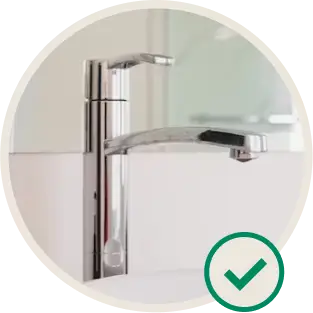
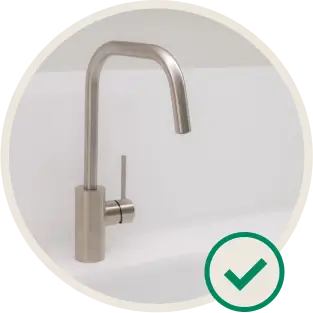
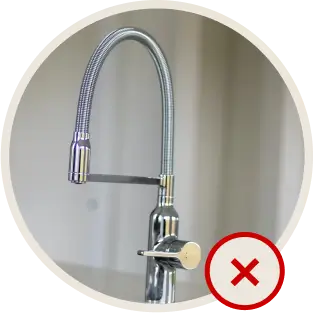
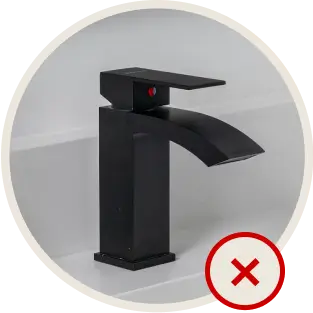
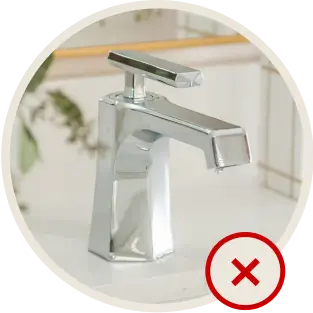
The length of the spout
The length of the spout is below 15mm
The length of the spout is over 25mm
Sensor faucet
Square or differently shaped faucet
The diameter of the thread does not match
The bubble covers over 22mm
5
Disassemble the faucet aerator
In order to install the Q-urify Water Filter, the faucet aerator needs to be removed. Most faucet aerators can be removed easily by twisting it off using your hand.
In case you need extra help, use the key for removal provided with your Q-urify Water Filter. It comes with 4 different sizes to match your faucet. Once you find the one that fits your faucet best, simply attach and twist it off using the key for removal.
DETAILS OF THE KEY FOR REMOVAL:
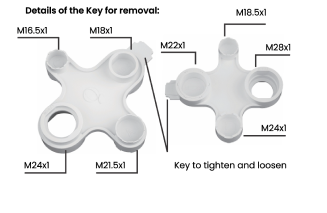
HOW TO REMOVE
Select the size to match the faucet aerator.
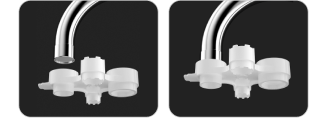
Screw the key to remove and disassemble the faucet aerator.
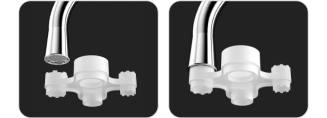
After removing the faucet aerator, make sure to check that no part was left behind inside your tap, such as rubber bands used for support.
6
How to install the Q-urify Water Filter
If none of the faucet thread accessories fit your faucet, then use the Universal Joint.
See the next page for instructions.
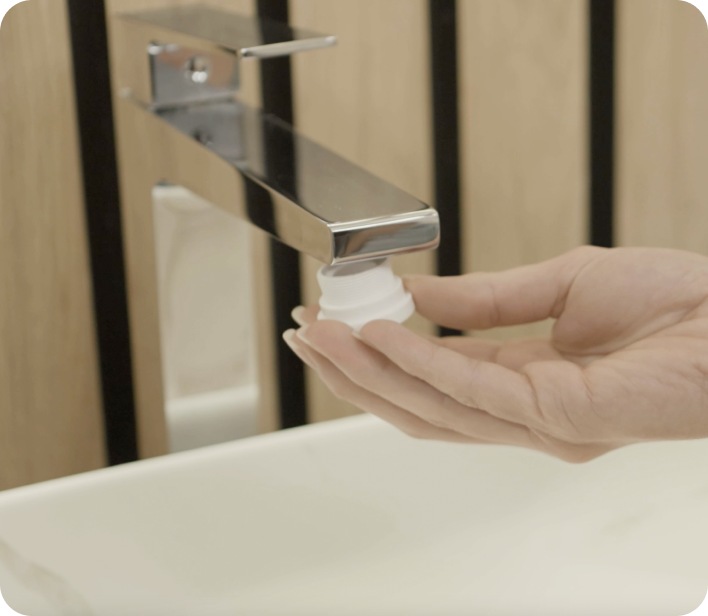
- Find the faucet thread accessory which best fits your faucet by size from the 7 provided. Note: There is a mixture of both internal and external threaded accessories, please test according to what suits your faucet. If none of the faucet thread accessories fit, then use the Universal Joint(refer to section 7)

- Find the silicone ring that best fits and place it inside the faucet thread accessory. This step is very important as it prevents any possible leakage inside the filter.
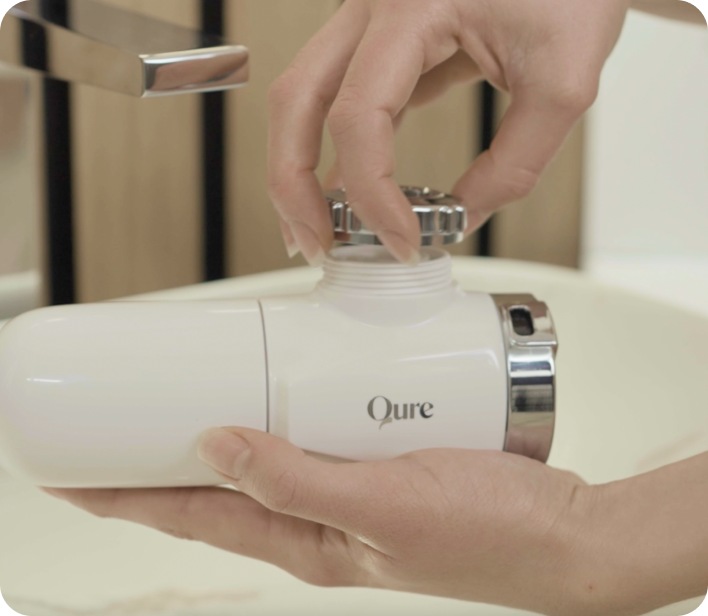
- Detach the mounting nut from the Q-urify Water Filter.
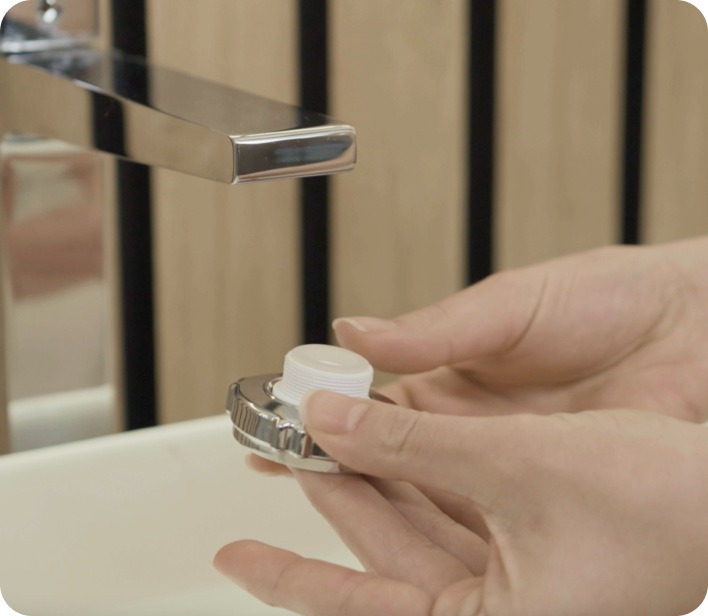
- Now it’s time to assemble the Q-urify Water Filter to your faucet. Put the faucet thread accessory (with the silicone ring inside) through the mounting nut and secure it onto your faucet. Make sure to secure it tightly to prevent any leakage.
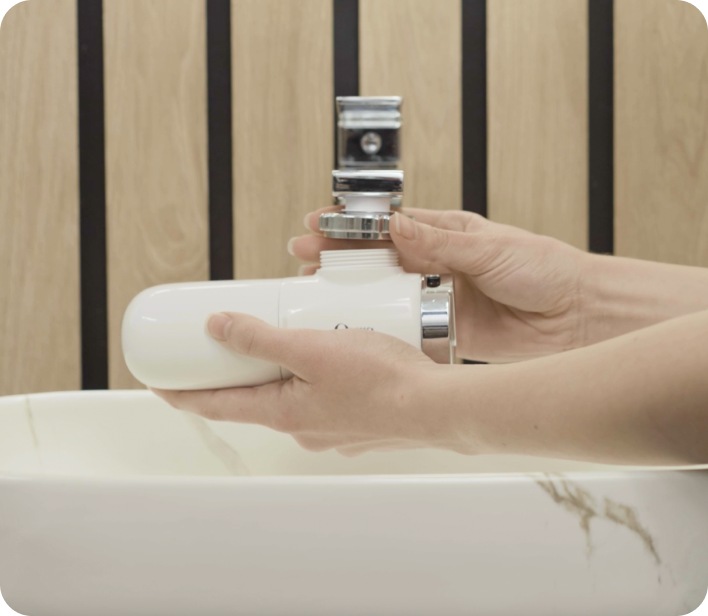
- Once tightened, secure the Q-urify Water Filter to the mounting nut.
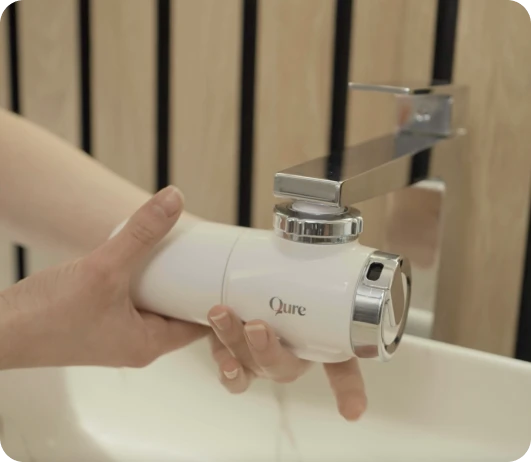
- Remove the Filter Tube Cover by turning it away. Check for a seal around the filter cartridge inside the Q-urify base and remove if present. Press and twist the filter cartridge into place. Place the Filter Tube Cover by twisting towards you.
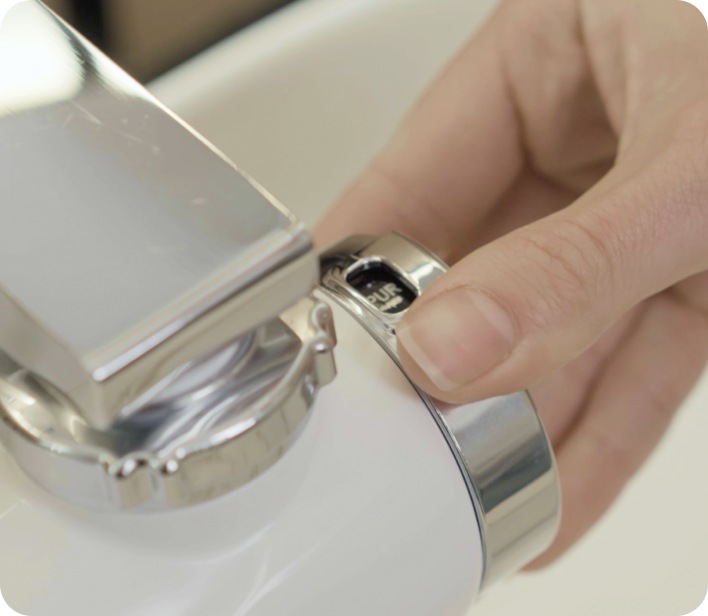
- For filtered water, pivot the switch to the upright position, where it clearly indicates “PUR” (short for purify). Turn the switch to the horizontal position, marked with “TAP,” if you prefer unfiltered water.
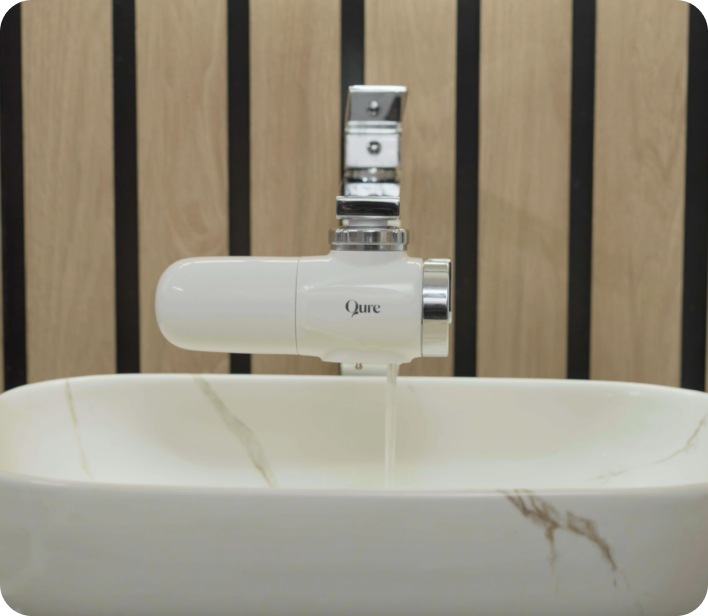
- Enjoy healthier, clearer skin!
7
Universal joint
If none of the faucet thread accessories fit your faucet, then use the
Universal Joint.
It’s to help
you install the Q-urify Water Filter to your circular faucet, regardless of its size.
If none of the faucet thread accessories fit your faucet, then use the Universal Joint. It’s to help you install the Q-urify Water Filter to your circular faucet, regardless of its size.
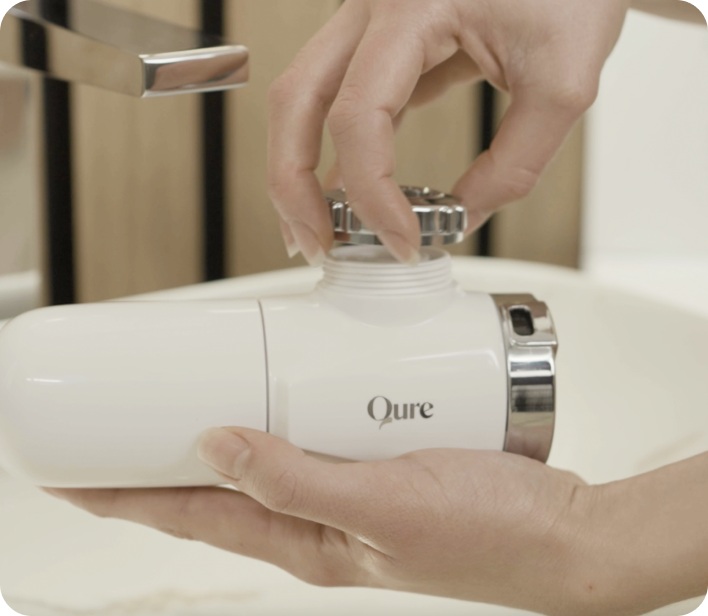
- Detach the mounting nut from the Q-urify Water Filter.
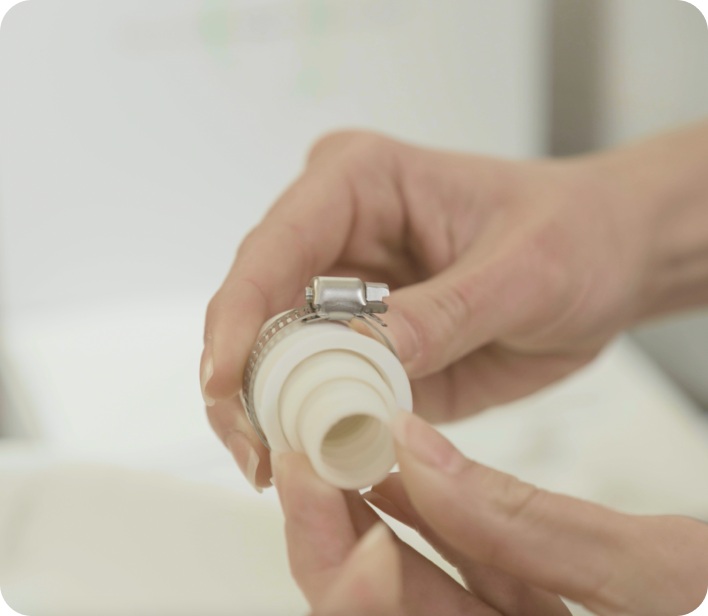
- The Universal Joint comes with two rubber pieces inside which you can use to adjust depending on the width of your faucet.
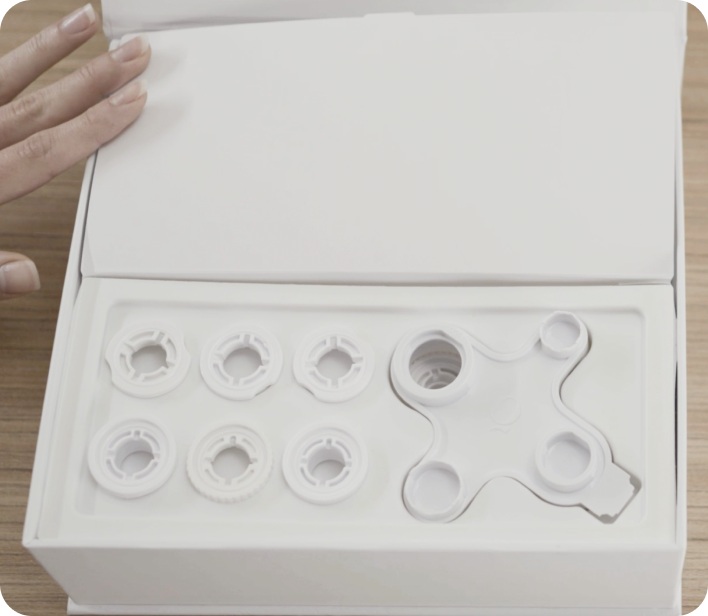
- From the 7 faucet thread accessories provided, find the one that perfectly fits the Universal Joint and put it aside.

- Place the faucet thread accessory through the mounting nut, and secure it onto the Universal joint. Then secure the Universal joint onto your faucet using the metal strap.
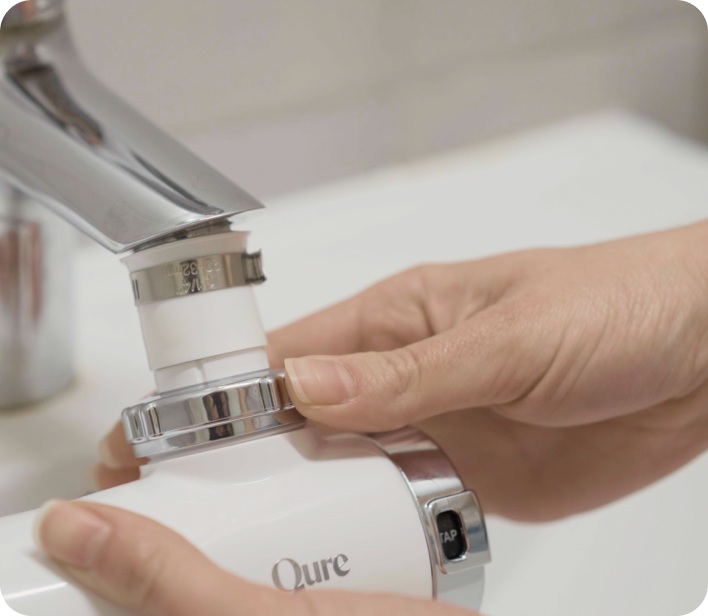
- Once tightened, secure the Q-urify Water Filter into the mounting nut.
8
How to replace the Q-urify Water filter cartridge
With daily use, it’s recommended to replace your Q-urify water filter every 3 months.
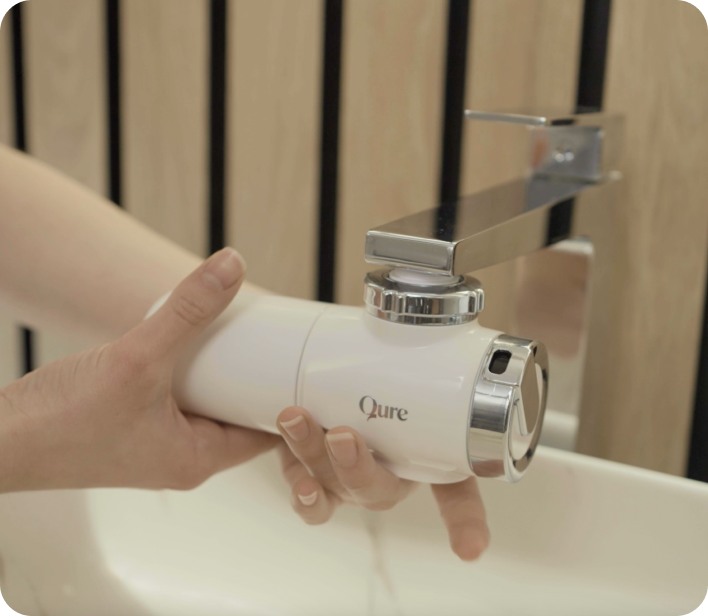
- Remove the Filter tube cover on the left side of the filter by turning it away from you, and separate it from the base.
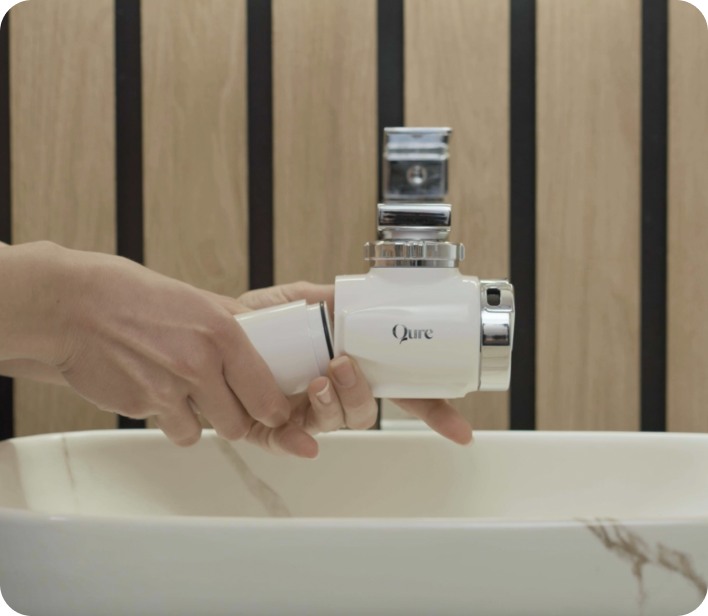
- Carefully remove the filter cartridge inside by slightly twisting and pulling it out of the Q-urify Water Filter base, then dispose of it safely.
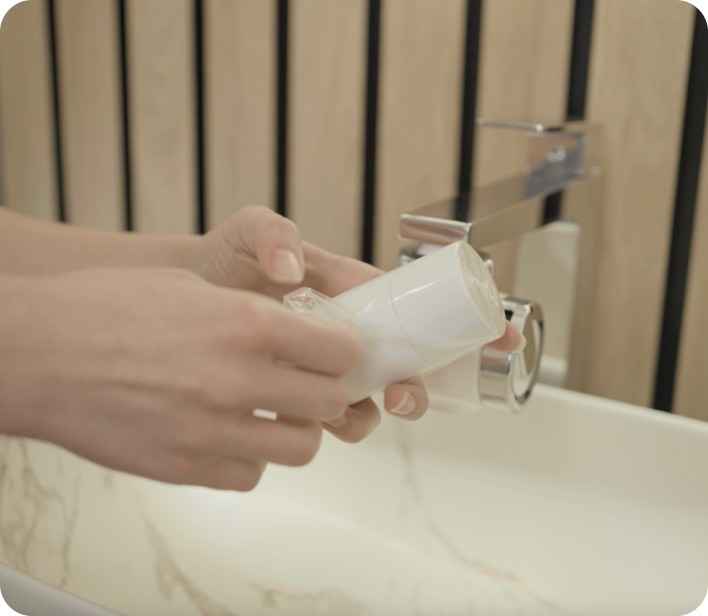
- Open the Q-urify Replacement Filter box and remove the seal from the Filter cartridge.
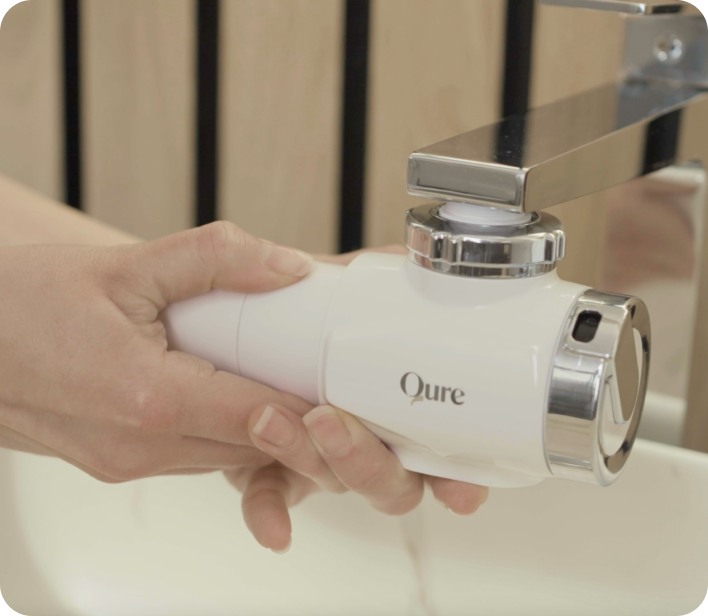
- Press and slightly twist replacement filter cartridge into the Q-urify Water Filter base. Once it’s secured, place the Filter Tube Cover back on by twisting towards you.
By having the switch in the horizontal position, marked with “TAP”, raw tap water will flow.
For
filtered water, turn the diverter switch to the upright position, where it says “PUR”.
Expect a small amount of carbon to flow through the tap as the carbon granules are activated.
This
should clear in 5-10 seconds.
9
Filter Maintenance
Cleaning the filter:
If the water flow slows significantly, please close the faucet and remove the filter cartridge.
Clean surface impurities with light sandpaper or steel brush, followed by rinsing with running water.
Do not use detergents or other cleaning products to clean the filter.
FILTER REPLACEMENT
To ensure clean, freshwater replace the filter regularly. Recommended filter replacement cycle is every 3 months. Where initial quality water is poor, a reduced cycle may be required to maintain filter performance.
10
Frequently Asked Questions
No, the water filter is designed specifically for skincare purposes. Do not use the filtered water for drinking or other non-skincare applications.
If you experience a significant reduction in water flow, close the faucet, remove the filter cartridge, and clean the surface impurities using light sandpaper or a steel brush. Rinse thoroughly with running water. Do not use detergents or other cleaning products.
Refer to the "Installation & Replacement of the Filter Element" section on section 9 of the user manual for detailed instructions on replacing the filter cartridge.
Yes, the effectiveness of the filter may vary depending on the tap water quality in different locations. The filter is designed to reduce impurities, but water conditions can differ.
No, it is not recommended to use detergents or other cleaning products to clean the filter. Clean surface impurities with light sandpaper or a steel brush and rinse with running water.
If you have sensitive skin or a skin condition, consult with a dermatologist before using the filtered water for skincare. Individual skin reactions can vary.
